[iOS] 스탠포드 CS193P 11강

이번 11강에서는 드래근앤드롭(Drag an Drop) 기능과 UITableView, UICollectionView에 대해서 다룹니다.
Drag an Drop
강의에서는 데이터를 이동 시키는 Interoperable한(상호운용적인) 방법이라고 소개합니다. iOS 11 이상의 장치와 iPad의 앱 사이에서 드래그 앤 드롭이 작동합니다.
어떻게 구현하나?
드래그 앤 드롭은 제스처 인식기를 쓰지 않고, interaction을 사용합니다. 사용하려는 뷰에 UIDragInteraction, UIDropInteraction을 추가해주는 것으로 간단한 드래그 앤 드롭을 구현할 수 있습니다. 아래의 코드로는 단순한 뷰의 움직임만 구현할 수 있고, delegate의 메서드들을 오버라이드 해야 뷰에 담긴 데이터들을 드래그 앤 드롭을 이용해서 복사하거나 이동시킬 수 있습니다.
let dragInteraction = UIDragInteraction(delegate: theDelegate)
let dropInteraction = UIDropInteraction(delegate: theDelegate)

view.addInteraction(dragInteraction)
view.addInteraction(dropInteraction)
Stating a drag
DrageInteraction 오버라이드 해서 드래그 하는 뷰의 데이터를 가져올 수 있습니다. 아래 메서드가 빈 배열을 반환하게 되면 드래그 되지 않습니다. dragItem에 직접 객체를 추가해줄 수도 있습니다. 아래 보이는 것처럼 UIDragItem은 NSItemProvider를 받는데
func dragInteraction(_ interaction: UIDragInteraction,
    itemsForBeginning session: UIDragSession
) -> [UIDragItem]

// UIDragItem 사용 방법
let dragItem = UIDragItem(itemProvider: NSItemProvider(object: provider))
dragItem.localObject = someObject
Adding to a drag
드래그 도중에 아이템을 추가할 수도 있습니다. 이해를 돕기위해 아이폰 홈화면에서 앱 옮기는 장면을 첨부했습니다. 드래그 하려는 UIDragItem들을 반환하게 됩니다.
func dragInteraction(_ interaction: UIDragInteraction,
    itemsForAddingTo session: UIDragSession
) -> [UIDragItem]
Accepting a drop
아래 메서드는 드롭이 끝났는지 알려주는 메서드입니다. 드롭할 때 드래그한 데이터를 처리하는 것을 메인 쓰레드에서 처리합니다. 그래서 드롭한 데이터들로 직접 UI 작업을 할 수 있습니다. session.canLoadObjects(ofClass)로 어떤 타입의 데이터를 받아오는지도 알 수 있습니다.
func dropInteraction(_ interaction: UIDropInteraction,
      canHandle session: UIDragSession
 ) -> Bool

 let stringAvailable = session.canLoadObjects(ofClass: NSAttributedString.self)
 let imageAvailable = session.canLoadObjects(ofClass: UIImage.self)
아래 메서드는 드롭 세션이 끝나는 것을 알리면서 UIDropProposal을 반환합니다. UIDropProposal은 copy, move, cancel 속성을 가지는데 드롭으로 아이템을 복사할지, 움직일지, 취소할지를 정할 수 있습니다.
func dropInteraction(_ interaction: UIDropInteraction,
	sessionDidUpdate session: UIDragSession
) -> UIDropProposal
Table and Collection Views
테이블뷰와 컬렉션뷰는 무한한 양의 정보에 무한한 접근을 제공하기 위해 사용됩니다.
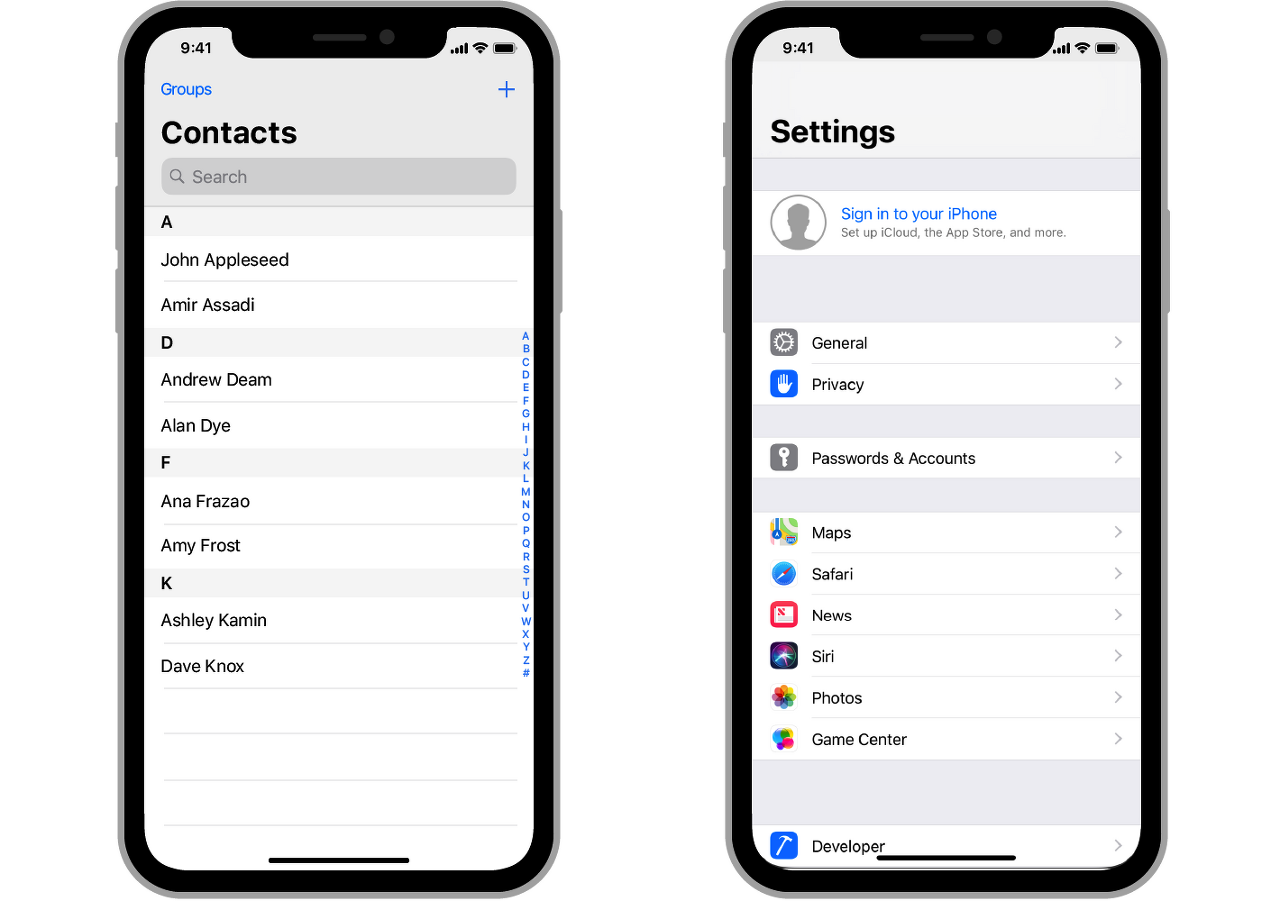
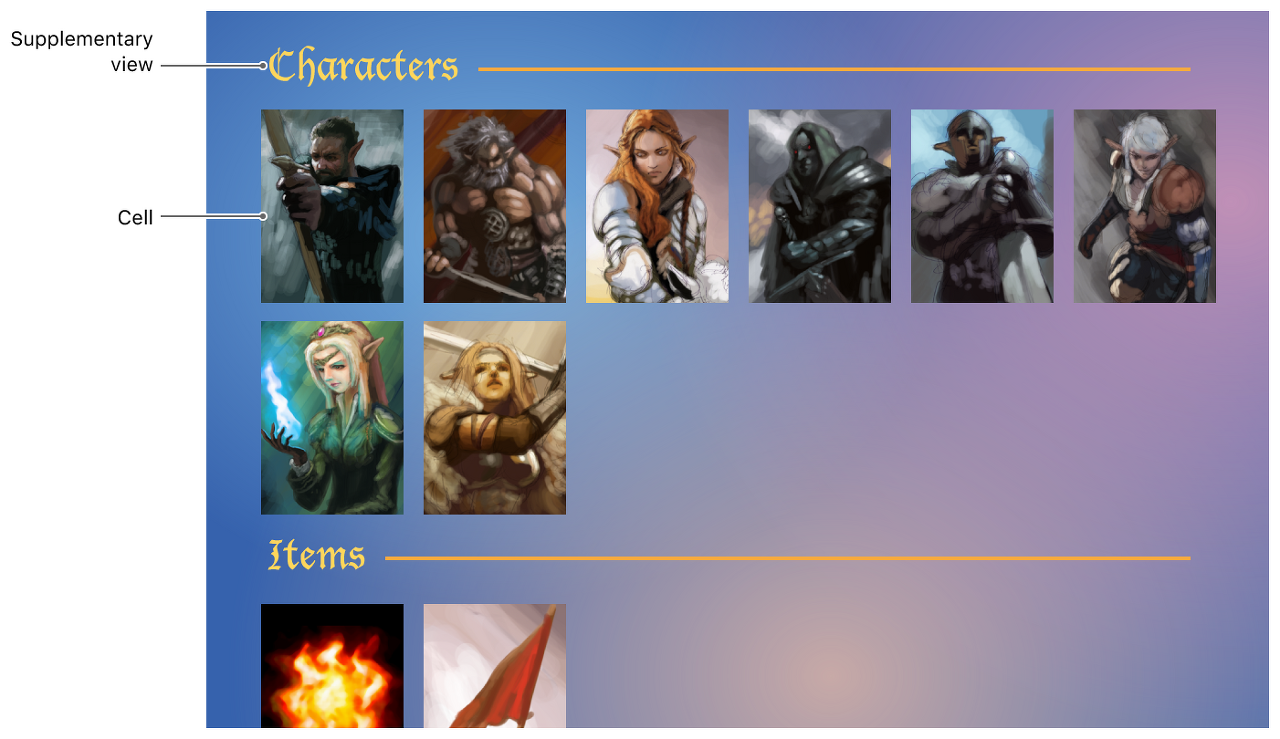
테이블 뷰는 긴 리스트로 정보를 보여주고, 컬렉션 뷰는 보통 2차원적인 방법으로 정보를 보여줍니다. 아래 사진 중 왼쪽은 테이블 뷰 예시이고, 오른쪽은 컬렉션뷰 예시입니다. 제가 경험한 바로는 간단한 리스트는 테이블뷰, 커스텀이 필요한 리스트는 컬렉션뷰로 구현하는게 좋은 것 같습니다.
Delegate, DataSource
테이블뷰와 컬렉션뷰는 많은 메서드를 갖고 있고, 개발자는 오버라이드 할 수 있습니다. numberOfSection은 섹션의 갯수를 정해줄 수 있습니다. 오버라이드 하지 않으면 1로 설정됩니다. 마지막 UITableViewCell, UICollectionViewCell을 반환하는 메서드는 각 행, 아이템에 들어갈 cell에 대한 정보를 정의해주고 반환해줍니다. 각 cell을 정의하는 방법은 테이블뷰, 컬렉션뷰 둘다 비슷합니다.
// UITableView
func numberOfSections(in tableView: UITV) -> Int
func tableView(_ tv: UITV, numberOfRowsInSection section: Int) -> Int
func tableView(_ tv: UITV, cellForRowAt indexPath: IndexPath) -> UITableViewCell

// UICollectionView
func numberOfSections(in collectionView: UICV) -> Int
func collectionView(_ cv: UICV, numberOfItemsInSection section: Int) -> Int
func collectionView(_ cv: UICV, cellForItemAt indexPath: IndexPath) -> UICollectionViewCell
Cell 정의하는 방법
Cell의 타입을 지정한 후에 dequeueReusableCell 메서드를 사용해서 "reuse pool"에 있는 cell을 가져오게 됩니다. 그 이후 cell에 대한 정보를 설정해주고, cell을 반환하면 됩니다.
func tableView(_ tv: UITV, cellForRowAt indexPath: IndexPath) -> UITableViewCell {
  let prototype = decision ? "FoodCell" : "CustomFoodCell"
  let cell = tv.dequeueReusableCell(withIdentifier: prototype, for: indexPath)
  cell.textLabel?.text = food(at: indexPath)
  cell.detailTextLabel?.text = emoji(at: indexPath)
}